Wednesday, July 31, 2013

Punch Art Swaps


Punches are amazing tools. 
It is fun to use them in other than the obvious way. 
Here are some of the swaps that I received in exchange for those five sets that I made. 
It is amazing what some of the participants came up with for their swaps!


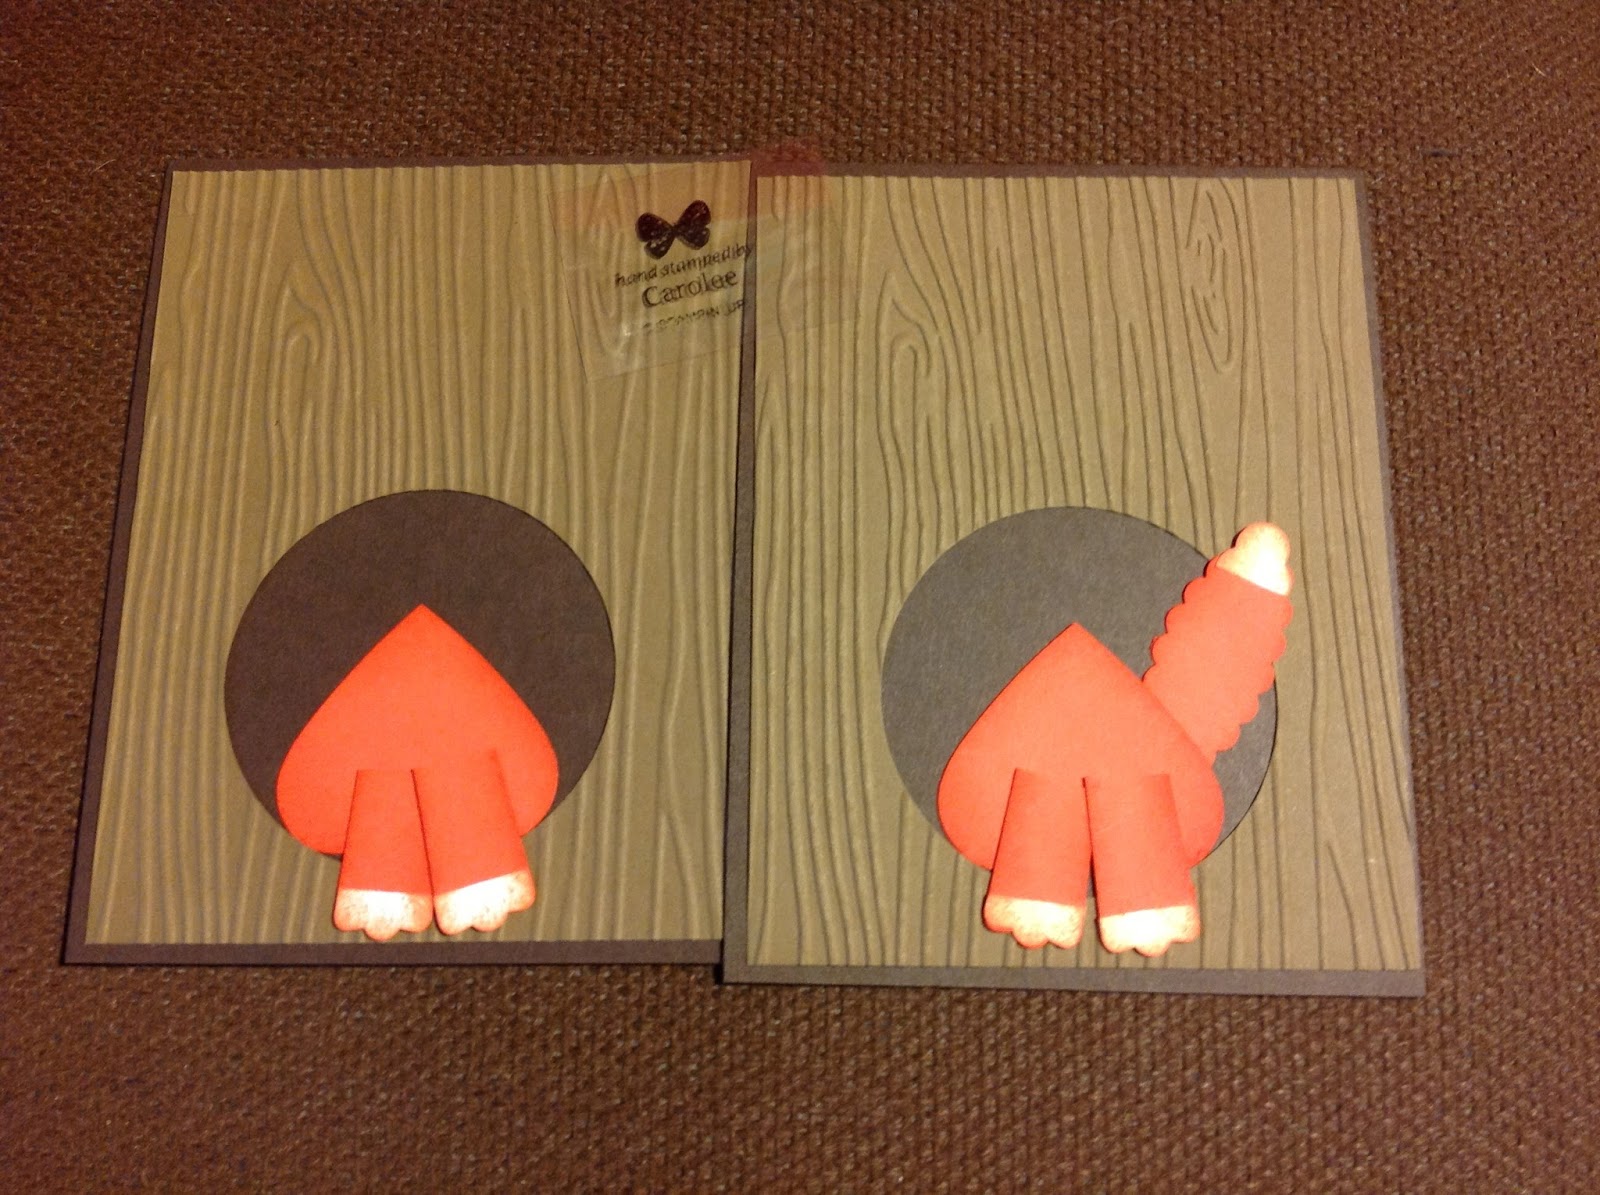
These two are from Maria Lema.
I love that bunny hopping into his hole. 
Don't you?


These gorgeous birds were done by Eldonna Epp from Alberta, Canada
The one on the right is even sitting on a real twig!


These are done by Vicki Koch. 
She is a Wisconsin gal.
I am so glad that I joined all the groups of this swap as I now have some wonderful samples so I can do some of these at the Stamp Alongs so you can do them also. 
Let me know which ones you would like me to prepare for you. 
Thanks for stopping by today. 


Sunday, July 28, 2013

Elegant Butterfly Punch Frame Card


These butterflies punched from the Natural Composition Specialty Paper with the Elegant Butterfly punch make a wonderful frame, don't they?


I started with the  four butterflies and laced they on scrap card stock to form a frame. 
Nest, I traced the inside edge and removed the butterflies. 
I cut out the part that was framed and made that piece into a mask by putting a very light line of the multipurpose liquid glue (p 175) 110755 on it and allowing it to dry completely. 
Placing that mask on the card, I sponged the opening and stamped the bird image from one of my favorite sets, Serene Silhouettes on page 64 of the big catalog. 
Remove the mask and place the bottom part of the card in the Argyle folder on page 191 and through the Big Shot.
Then I attached the butterflies with dimensionals. 
I hope that you will try one of these frames. 
Send me a copy of what you do with it! 
Thank you! 

Thursday, July 25, 2013

Mini Stamp Along and Convention Highlights


Saturday I will be at the Artisan on 8th Market in Manitowoc with these four cards. You can make three for a $5 fee or do all four for free with a $35 order. 
Have you started your Christmas cards yet? This would be a good opportunity to do that. 
Come any time between 10:00 AM and 3:00 PM 
I love punch art! Don't you?


5800 people is a large group!
I took this from the top of the escalator on my way to the Main Stage presentation. This was just before the doors were opened. 


This is one of the display boards. They had all of the cards pinned up to form the letters.
Most of the time the words weren't visible because there were too many people in front of them to take pictures of the cards. 


I was so happy to be able to meet up with three of my four uplines. 
Here I am with Susie Reno and Jill Olson. 
Jill signed up to be a demo the first week that Stampin' Up! started. 
She was also celebrating her 25th year with the company! 
My direct upline, Ann Huebner, was also there. 
We were able to meet up and have a meal together. 
What a wonderful time to meet up with Stamping friends! 

Meow!

I wouldn't want to meet up with this cat! It has quite an attitude. 
I think it has to do with the eyes. 
Some of them looked more friendly than others. 


The cat is on a background of crumb cake that has been textured at the top with the woodgrain folder. 
The table cloth is one half of a 3" square that had the gingham wheel applied with Real Red ink. 
Next, I added the strip of red to edge the table. 
The white, wide oval made the body. The black wide oval was put back through the punch to make the smaller ovals for the spots on the cat. The middle section was put on the back for the top of the head. 
I slipped this part in behind the table edge. The ears are tips of the pennant punch and are tucked in behind the body. 
The tail, made from the word window punch with an end of the word window in white that is fussy cut at one end and attached to the end of the tail is also tucked in behind the body.
Legs are made from one Modern Label punch that has the little label from the punch pack in white added for feet at each end. It is then cut in half and added to the front of the body.
Two white circles from the punch pack are added for cheeks. I sliced very narrow strips of black card stock and placed them across the cheeks and secured them with the pink heart from the Owl Builder punch. The eyes are also made from that heart from the Owl Builder but it had to be cut in half. The angle and the dots in the middle that are applied with a marker are what causes that attitude! 
If you make a cat of your own, please send me a picture. I would love to see yours! 


Thanks for stopping.


Wednesday, July 24, 2013

Inspiration comes from all over!

Today I am showing you the fox!


Here are the punches that I used.
I sponged all of the edges with the Tangerine Tango ink. 


I love this little guy BUT was it ever LABOR intense! 
Making one or two isn't too bad but I had 20 + 1 to make for the swap! 

I started with the Soft Suede card stock put through the Big Shot in the Woodgrain folder. I punched out the 2 1/2" circle and layered on Early Espresso card stock.
This is where I got all the circles for the crib that I showed you yesterday! 
Next, I put the full heart in the opening.


Here I added the feet. 
The tail is tucked behind the full heart. 


The head is assembled separately.


Then it is added to the card.
Cutting that tiny heart in half for the eyes is not easy but worth it. The little bit of white gell pen in the center of each eye puts on the finishing touch that is needed. 


Where did I get the idea to do this little guy? 
I checked on Pinterest and saw these two pins. 


How do you think I did?

Thanks for stopping by today. 
The Cat is nest on the list.


Tuesday, July 23, 2013

I love Punch Art!

It is always fun to use the punches in a different way than they were intended to be used. 
Are you good at seeing different ways to use them? 
I signed up to do five different groups for convention! 
Here they are. 
Which one do you like the best?


Over the next few days I will share how I made these. 
Then I will show you some of the fantastic swaps I received in exchange. 


This one came about because I had the 2 1/2" Soft Suede circles that were embossed with the woodgrain folder left over from the fox card. 
I also have Christmas on my mind from my Christmas in July event. 
All of a sudden, I saw a crib! 
I cut the circle in half and took the 1" square punch and made the cuts for the legs. 
I made a template so they would get to be about the same size. 
Next came the baby. 
A narrow strip of card stock in the Soft Sky color punched with the scallop oval and tucked behind the crib worked. Blushing Bride with the 3/4" circle makes the head. 
Aren't you glad to have Blushing Bride back?
Now that I had that part  ready....it needed a background! 
I love sponging! 
The oval shape framelet cut out of a scrap and made into a post it works for a mask. ***
Put the mask on the card and sponge Daffodile Delight in the center and Soft Suede around the edge.
Remove the mask and stamp the greeting. 


 *** Did you know that you can make your own post it with the Multipurpose Liquid Glue?
Put a light line of glue on the shape and allow it to dry completely and you can use it over and over to mask the card. 

Tomorrow, I will show you the one that produced all of the circles i used for the crib. 


Monday, July 15, 2013

Punch Art Swaps for Convention

I will be leaving for convention soon! 
I am getting excited to meet up with other demos that I only get to see at convention. 
I have made many good friends through stamping. 
These are my punch art swaps. I will be getting 19 new ideas for each of these. 
I will post some of the ideas I get and next week I will give you the directions so you can make these if you choose.
Which one do you like the best?


If you subscribe to the blog by putting your address in you won't have to check back as it will come right into your email whenever I post.

Thanks for stopping!


Monday, July 8, 2013

Shades of Grey!

Shades of Grey!
That is the challenge over at Less is More this week.


These shades of grey,  all done with Smoky Slate ink, make an easy to mail card to let someone know that you are thinking of them during a time when they need their friends. 
The Delicate Details Lace Tape makes that border so easy to make. 
Just put it down, sponge over it, peal it off and it looks like you spent a lot more time on it than you actually have. Don't you just love quick and easy?  I sure do!
The flower is stamped on a separate piece and punched with the Pansy Punch. The Delicate Doily behind it gives it dimension. 
All supplies are Stampin' Up! 

Sunday, July 7, 2013

Christmas in July!

Only six months until Christmas! 
Time to get started on your cards. 
Have you started yours? 
Here are two of the Christmas choices that you will have this month at the Stamp Along.


There are a few more Christmas ones and several other selections as well. 
Sorry this post is out so late. 
Does time just escape from you, too?